1 构建Eclipse编程环境
1.1 Eclipse下载
下载 Eclipse , 选择 Eclipse IDE for C/C++ Developers , 并根据你的电脑版本进行下载。

1.2 构建Windows CMD环境
首先需要下载并安装git工具,具体操作可以参考链接 。
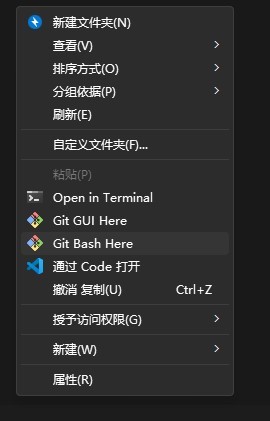
使用git下载RISC-V工具链与bl_mcu_sdk,在电脑的文件夹下右击鼠标,选择Git Bash Here。分别输入以下指令,即可实现下载。
    //下载RISC-V工具链指令
    git clone git@gitee.com:bouffalolab/toolchain_gcc_t-head_windows.git
    //下载bl_mcu_sdk指令
    git clone https://github.com/bouffalolab/bl_mcu_sdk.git
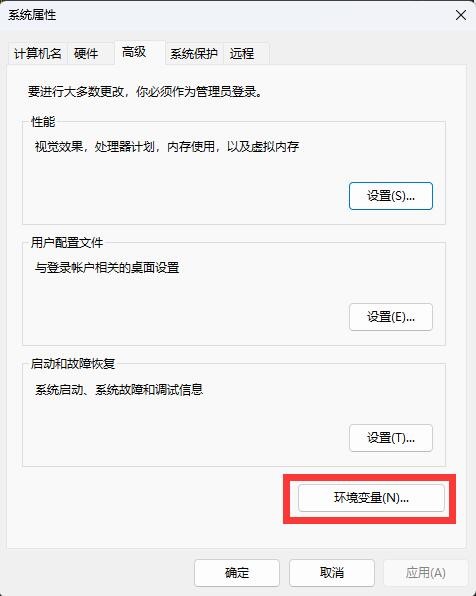
- 下载完成RISC-V工具链与bl_mcu_sdk,需要将make、ninja、下载的RISC-V工具链路径配置到系统环境变量中, 其中make和 ninja工具位于bouffalo_sdk/tools目录下。
1: 打开电脑设置,进入高级系统设置,选择环境变量。
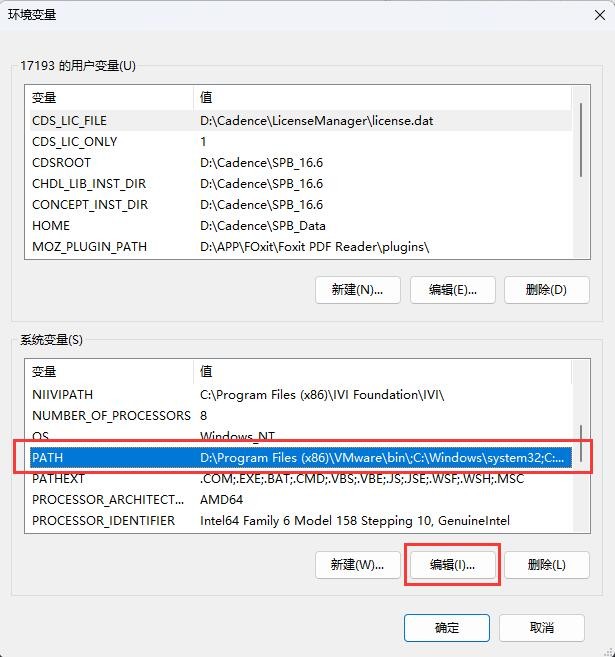
2:选中PATH系统变量,点击编辑。
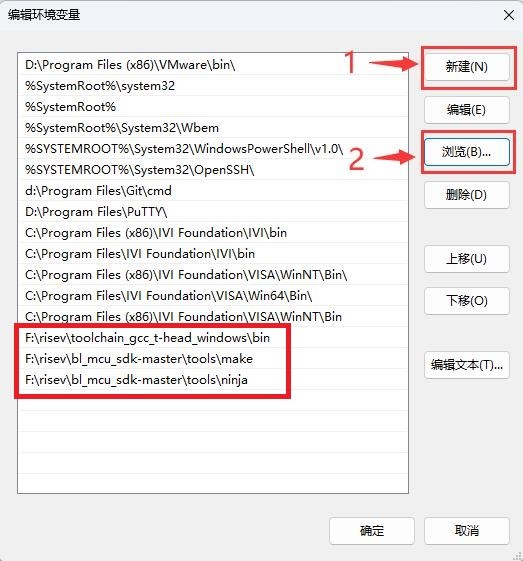
3:点击新建,点击浏览,分别添加三个变量。“toolchain_gcc_t-head_windows\bin”,“bl_mcu_sdk\tools\make”,“bl_mcu_sdk\tools\ninja”这三个文件夹。
4:添加完成PATH系统变量之后,在键盘上点击“Win+R”键,输入cmd,点击确定。

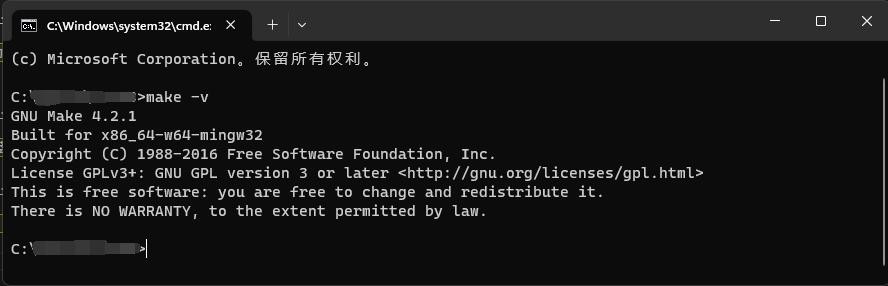
5:输入以下命令,查看make是否添加成功,若返回以下信息代表添加成功。
make -v
6:输入以下命令,查看gcc是否添加成功,若返回以下信息代表添加成功。
riscv64-unknown-elf-gcc -v

1.3 Eclipse导入SDK
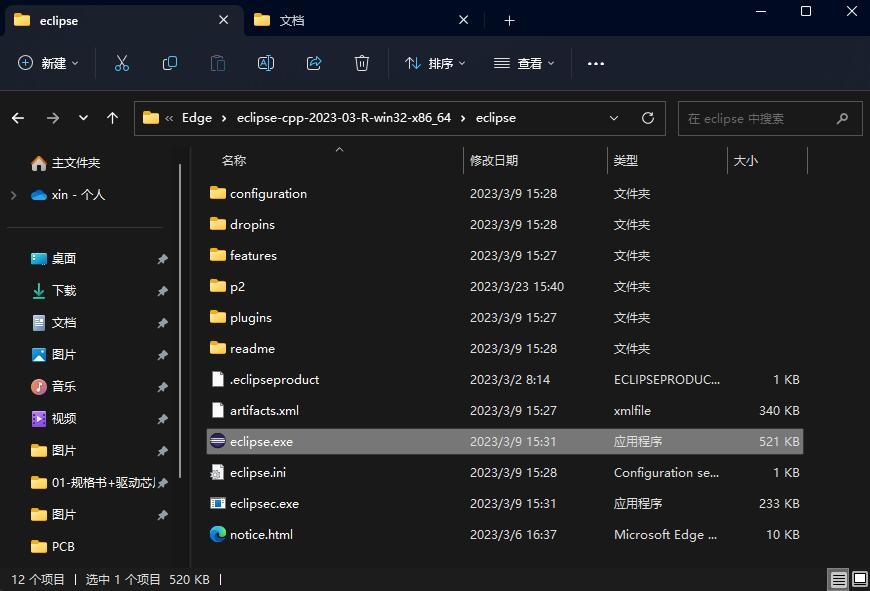
- 下载好的Eclipse软件解压缩后,双击打开Eclipse.exe。
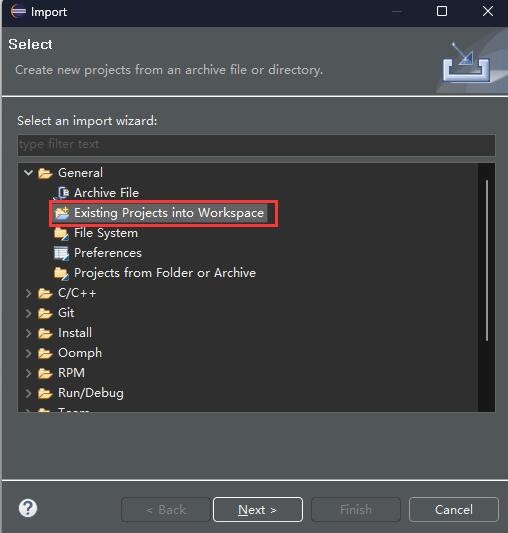
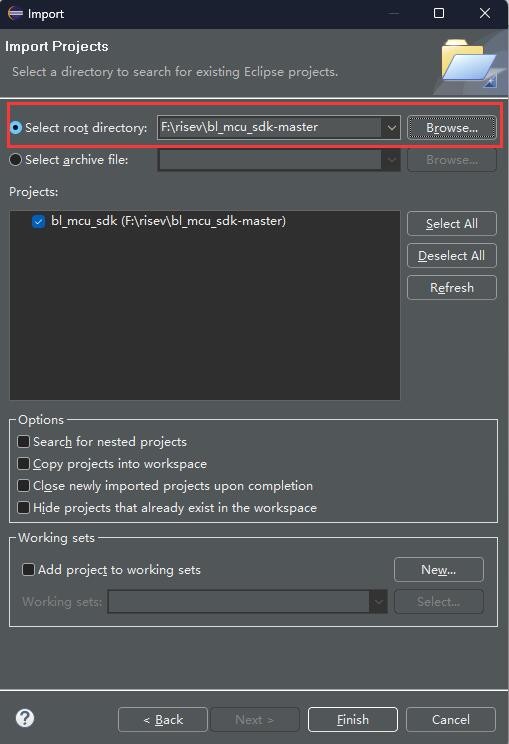
- 进入Eclipse后依次点击File->Import,选择General > Existing project into workspace 并点击Next。
2 编译
- 双击 Build Targets 中的 make 即可编译 helloworld。双击 clean 即可清除 helloworld 下的缓存。
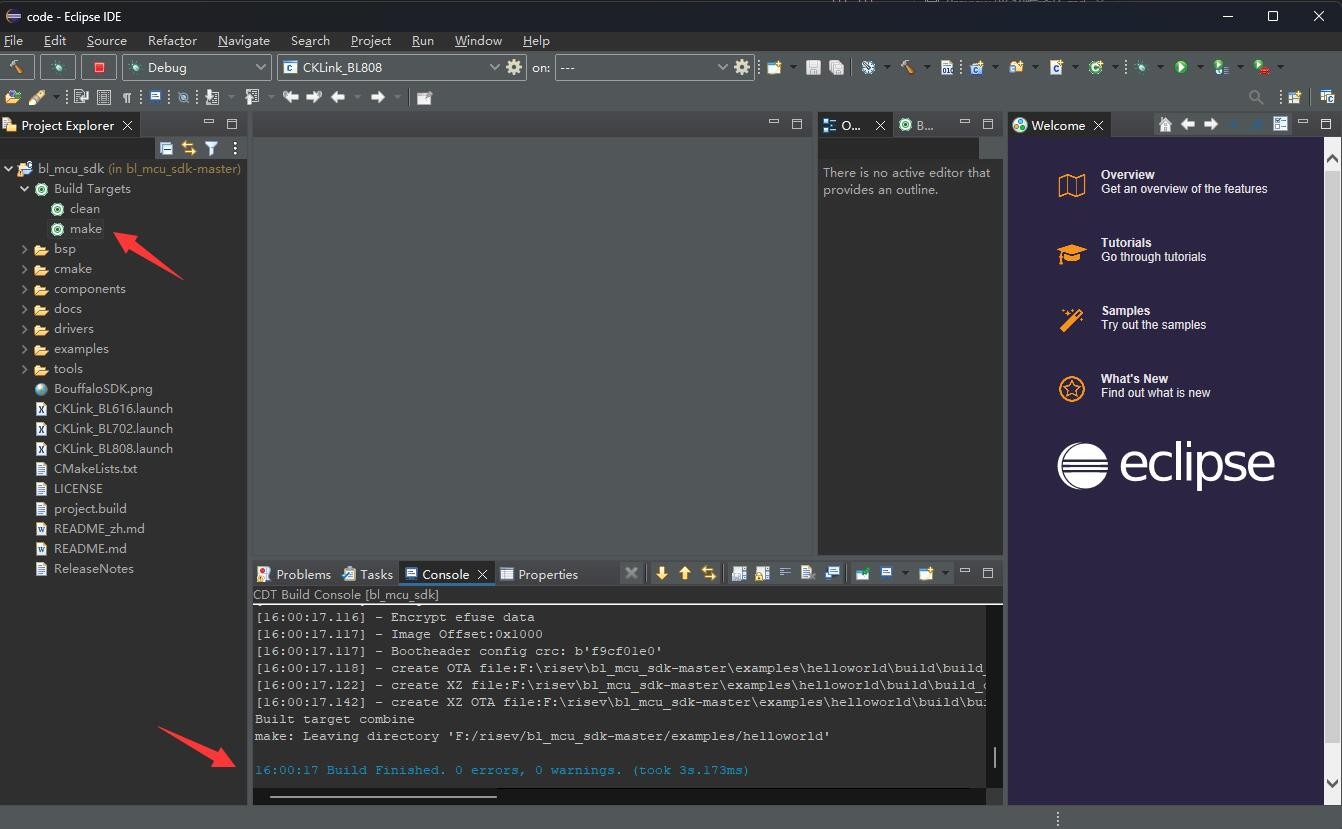
- 如果需要更换 demo ,右击 Build Targets 中的 make,修改 Build target 里的内容即可,内容为指定 demo 下 Makefile 文件的路径。
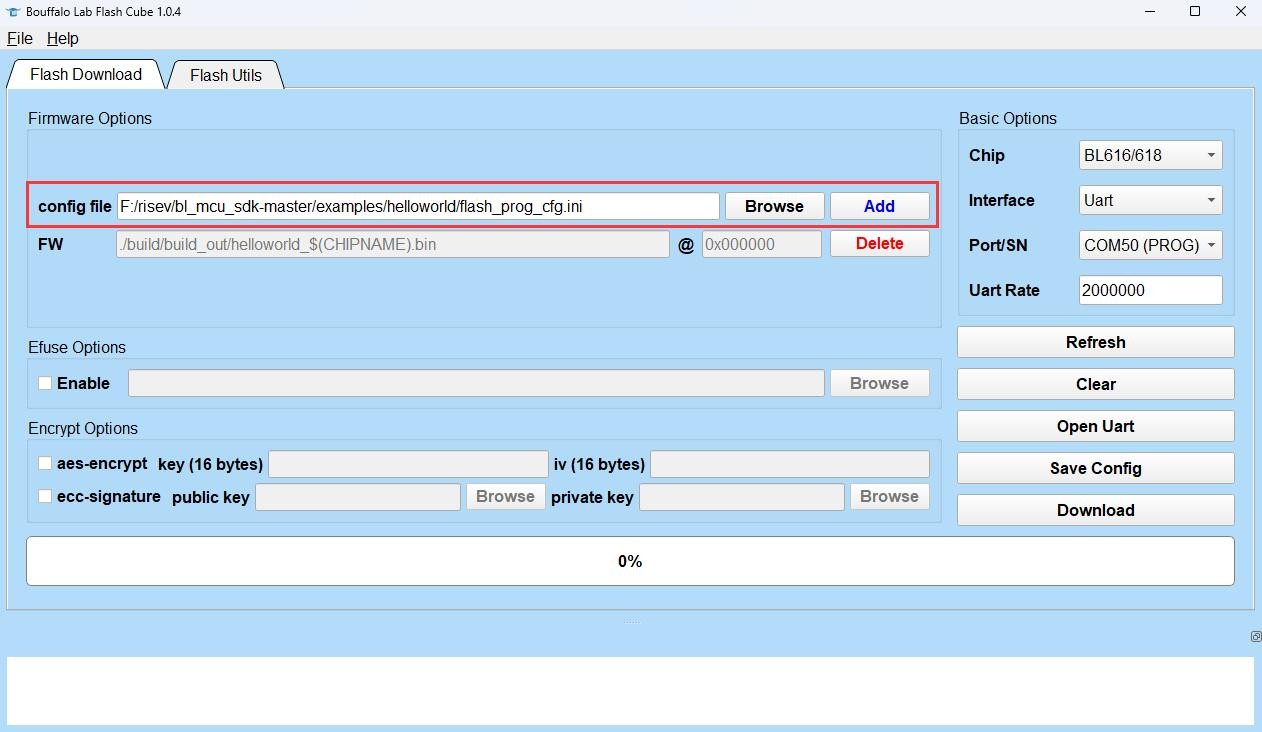
3 烧录程序
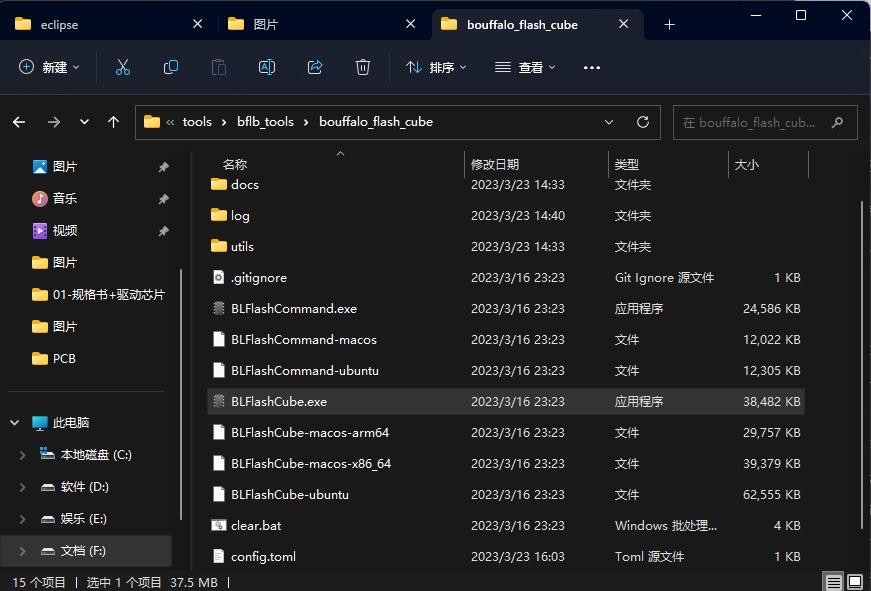
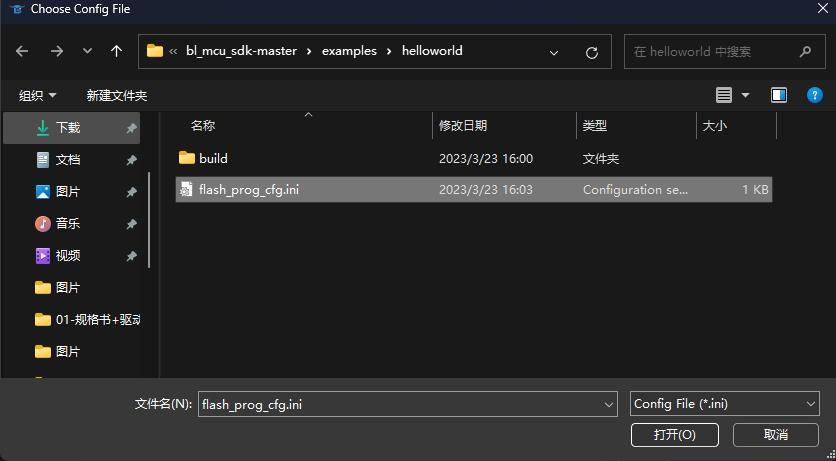
- 选择Flash Download下载模式,在config file中,选择需要烧录的目标文件的Flash prog cfg.ini。我们以“helloworld”demo为例,点击Browse,在bl_mcu_sdk\examples\helloworld文件夹中,选择Flash prog cfg.ini。
4 调试
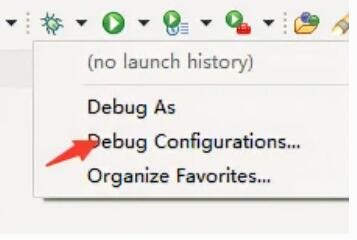
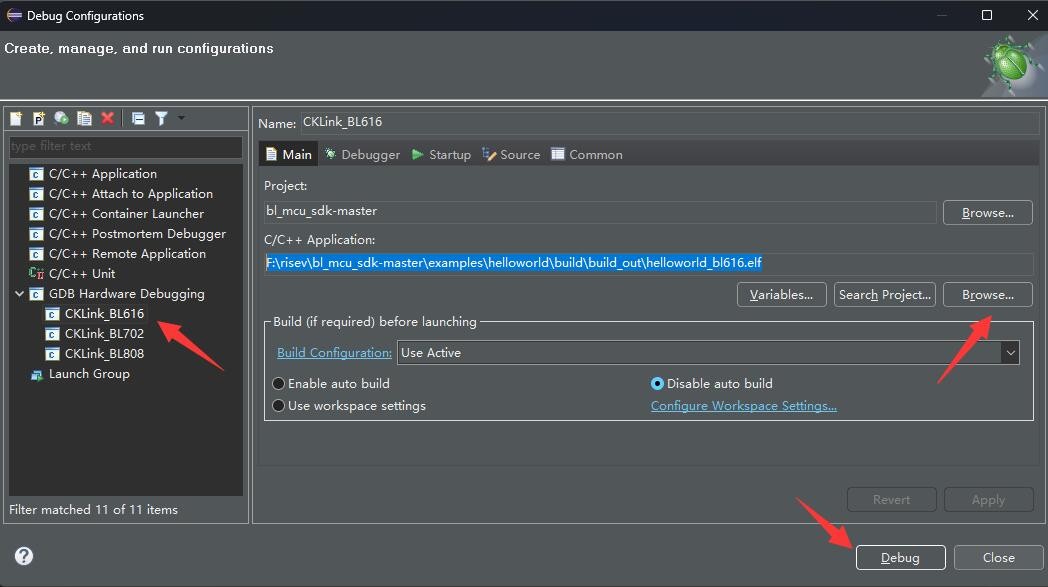
- 左侧打开GDB Hardware Debugging,选择对应芯片的配置按钮,并导入编译生成的 elf, 最后点击 Debug。

 网站备案号:ICP备16046599号-1