BL618评估板程序烧录
1.1 下载烧录工具
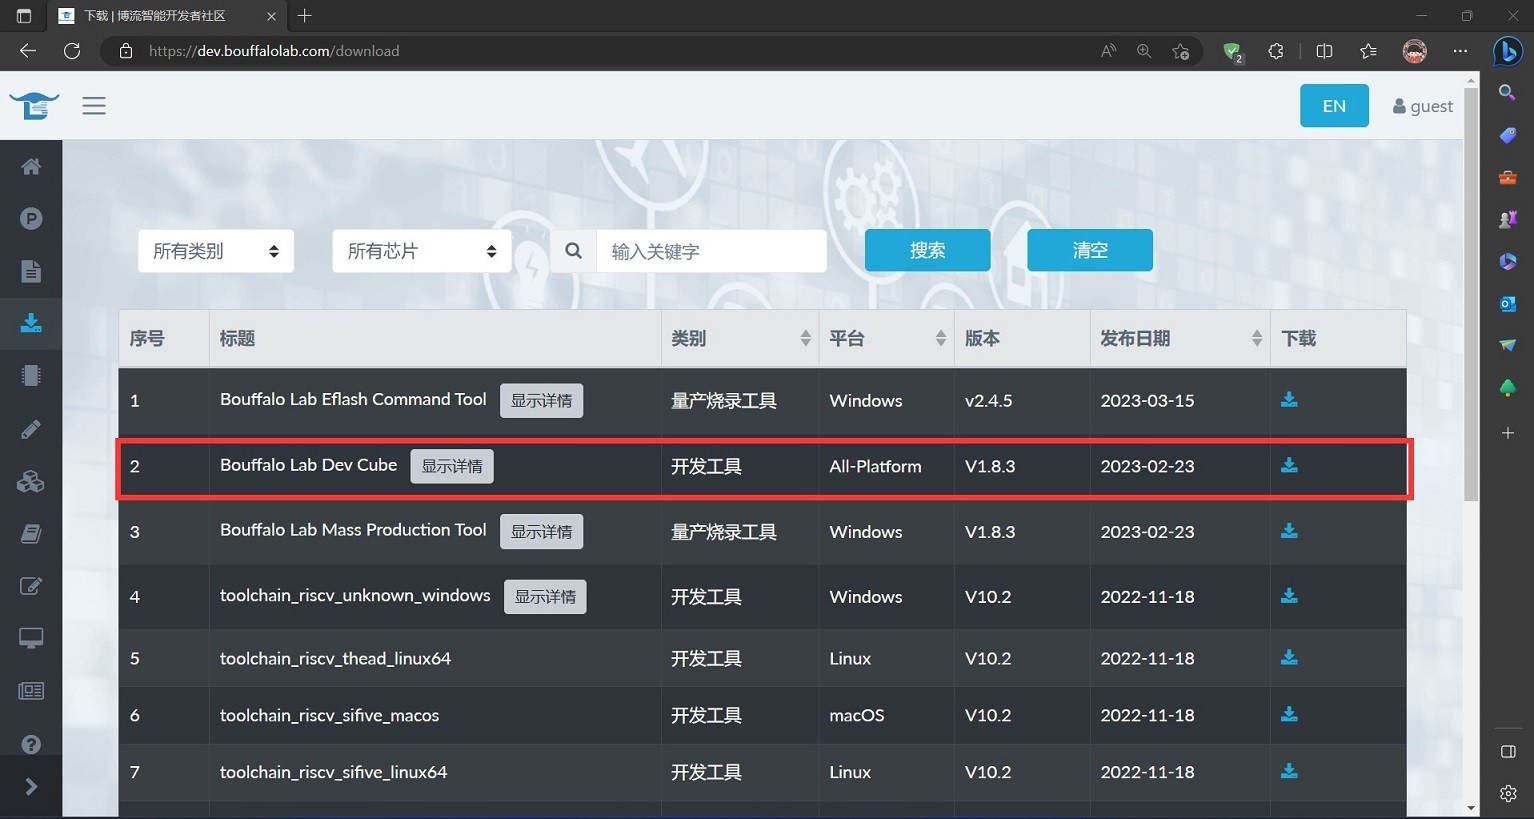
可以在博流智能的开发者社区,下载“Bouffalo Lab Dev Cube”烧录工具。
1.2 烧录方式1:使用CK-Link烧录
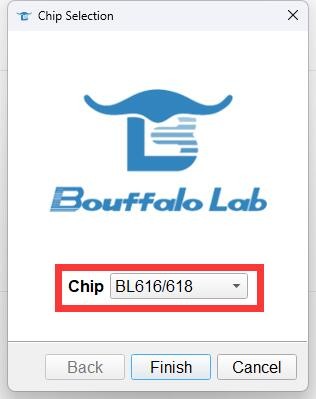
1.双击下载好的“Bouffalo Lab Dev Cube”烧录工具,选择“BL616/618”,点击“Finish”。
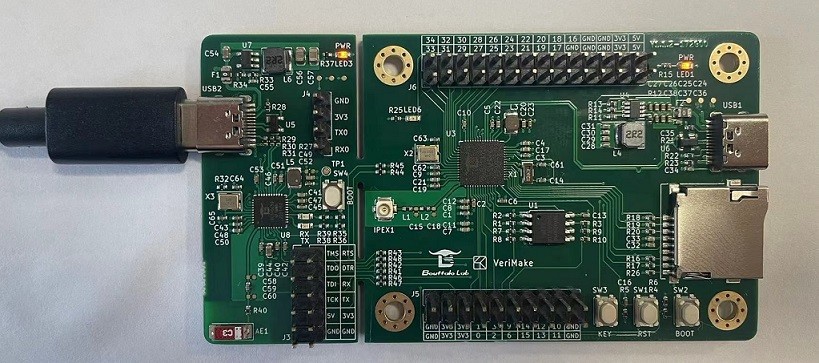
2.使用数据线连接BL618评估版的左侧USB接口。
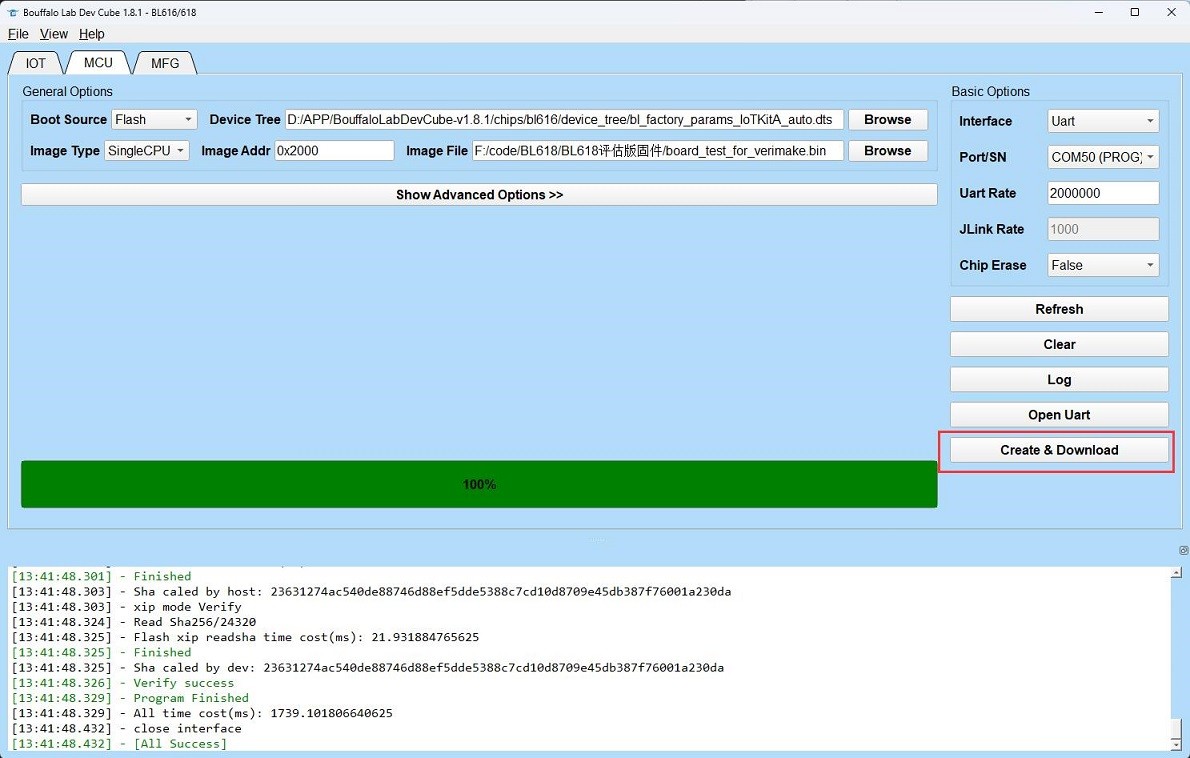
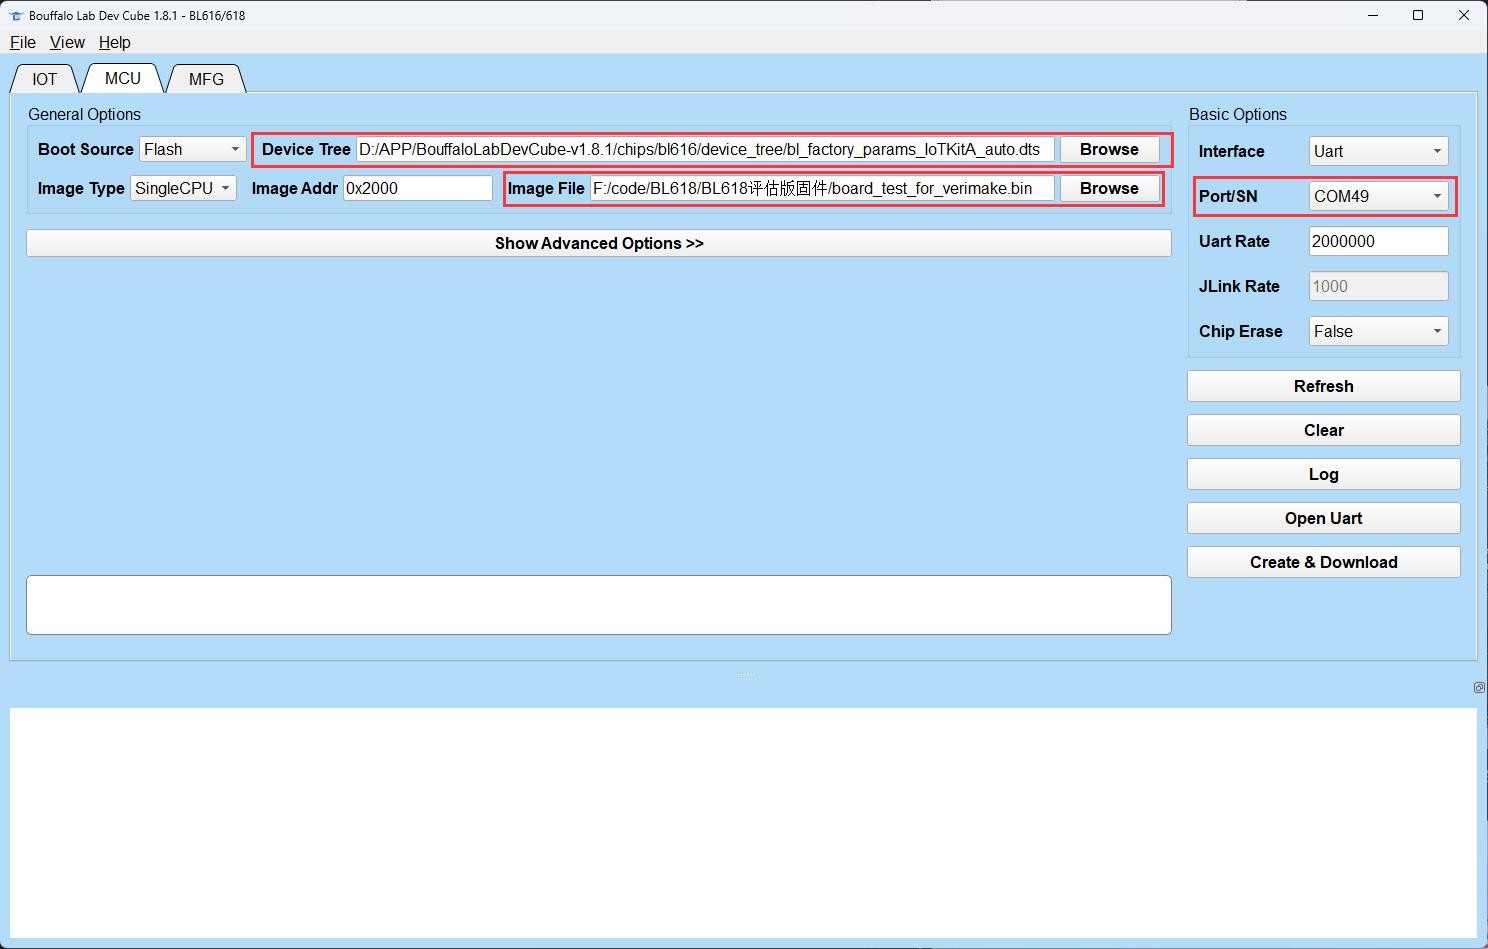
3.选择MCU烧录模式,在Device Tree中,选择“bl_factory_params_IoTKitA_auto.dts”文件,Image File中,选择你的烧录目标文件,Uart Rat设置为“2000000”。点击Refresh,可以看到在Port/SN中,出现了一个名为“COMx(PROG)”的设备。

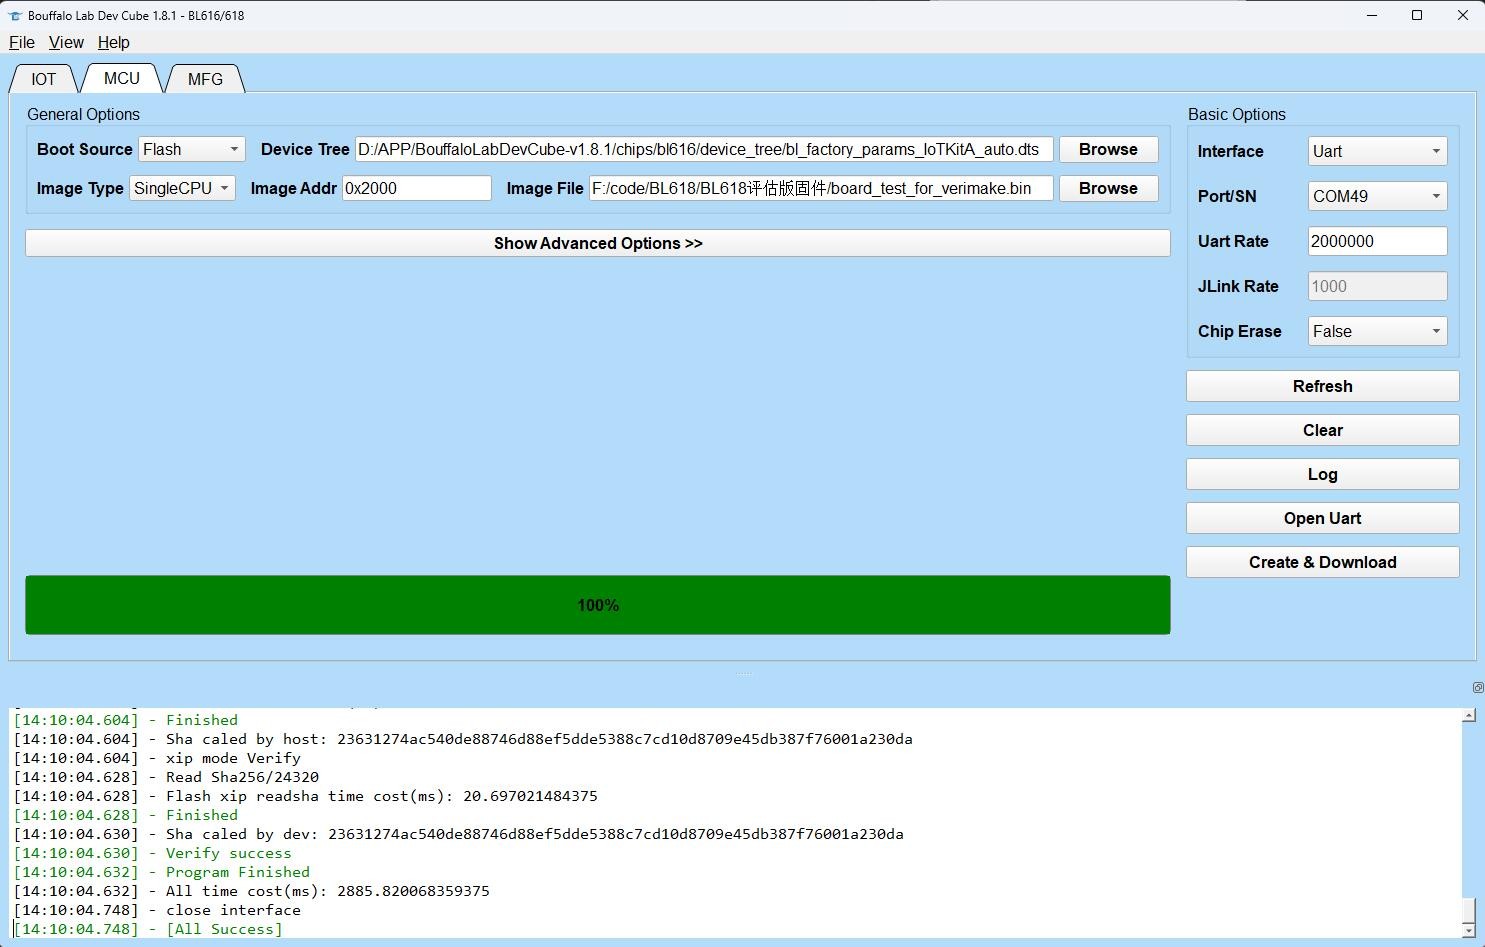
4.点击create&Download,进行烧录程序。进度条到达“100%”,代表程序烧录成功。点击评估板上的“RST”按键,新烧录的程序就开始运行了。
1.3 烧录方式2:使用USB烧录
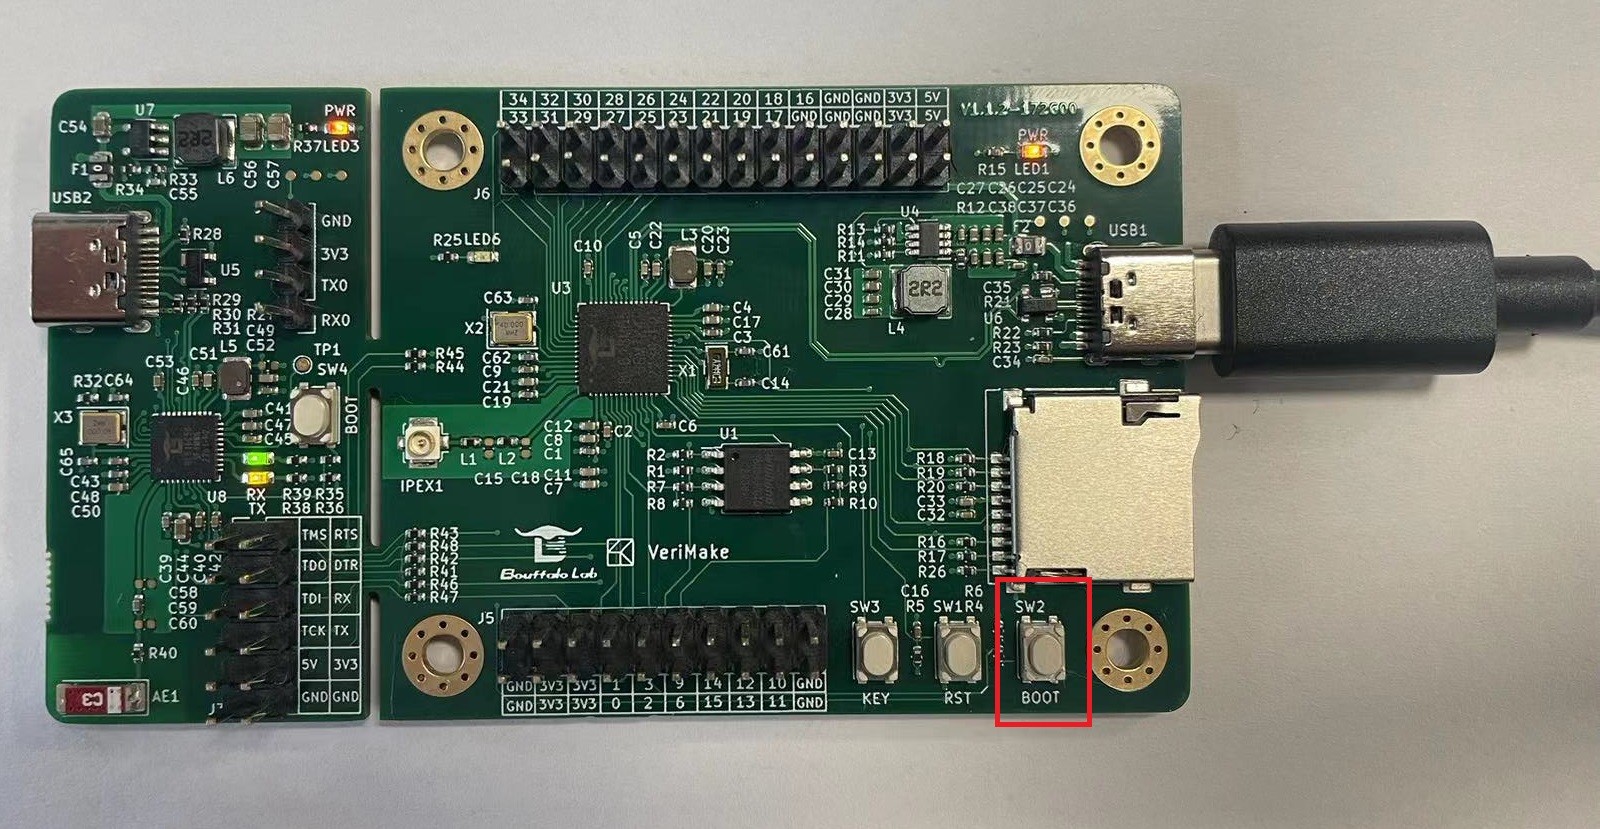
1.按住BL618评估板右下角的“BOOT”按键,然后将数据线连接到评估版的右侧USB接口,紧接着松开“BOOT”按键。(注意:一定要先按住“BOOT”按键,再连接数据线)。
3.选择MCU烧录模式,在Device Tree中,选择“bl_factory_params_IoTKitA_auto.dts”文件,Image File中,选择你的烧录目标文件,Uart Rat设置为“2000000”。点击Refresh,可以看到在Port/SN中,出现了一个名为“COMx”的设备。
4.点击create&Download,进行烧录程序。进度条到达“100%”,代表程序烧录成功。点击评估板上的“RST”按键,新烧录的程序就开始运行了。
 网站备案号:ICP备16046599号-1