编译将在Linux下完成,我选择使用VMWare与Ubuntu的组合。关于VMware和Ubuntu的下载及配置在这里就不过多介绍了,网上有丰富的教学。 而烧录会在Windows中使用博流官方工具完成。
依次执行以下命令下载安装SDK以及所需工具,应用等
sudo apt install build-essential python3 python3-pip git screen  //software packages
git clone --recursive https://github.com/Ai-Thinker-Open/Ai-Thinker-WB2.git //sdk包
sudo apt-get update
sudo apt-get install make
cd
cd toolchain/riscv/Linux/
. chmod755.sh
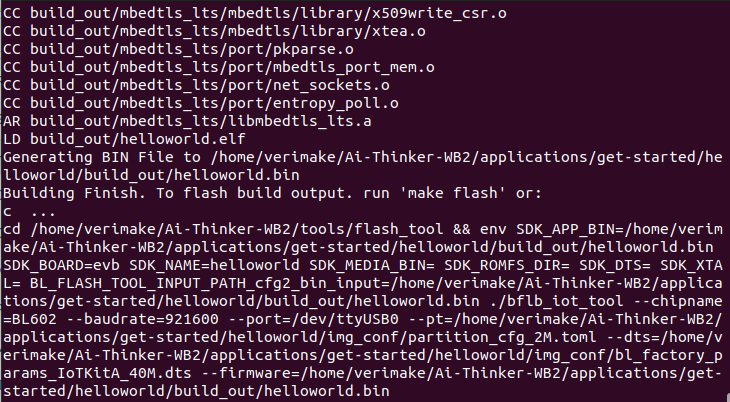
使用命令cd ..逐级退回,回到sdk文件夹。然后输入cd applications/get-started/helloworld找到这次需要编译的例程Helloworld。然后输入make -j8完成编译。如图所示则编译成功。
cd ..
cd applications/get-started/helloworld
Helloworld
make -j8
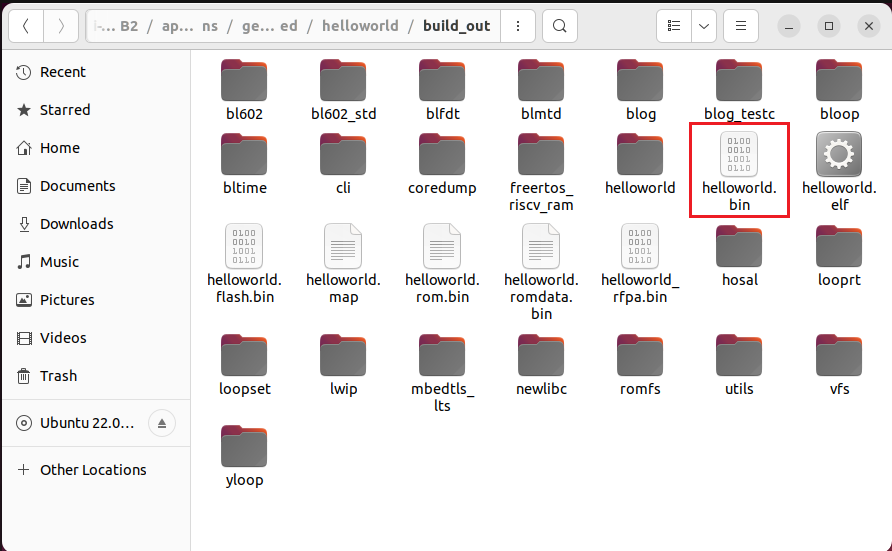
打开helloworld文件夹中的build_out文件夹,可以看到编译好的helloworld.bin(如下图所示)
helloworld
build_out
helloworld.bin
接下来就要回到Windows进行最后的烧录工作了。
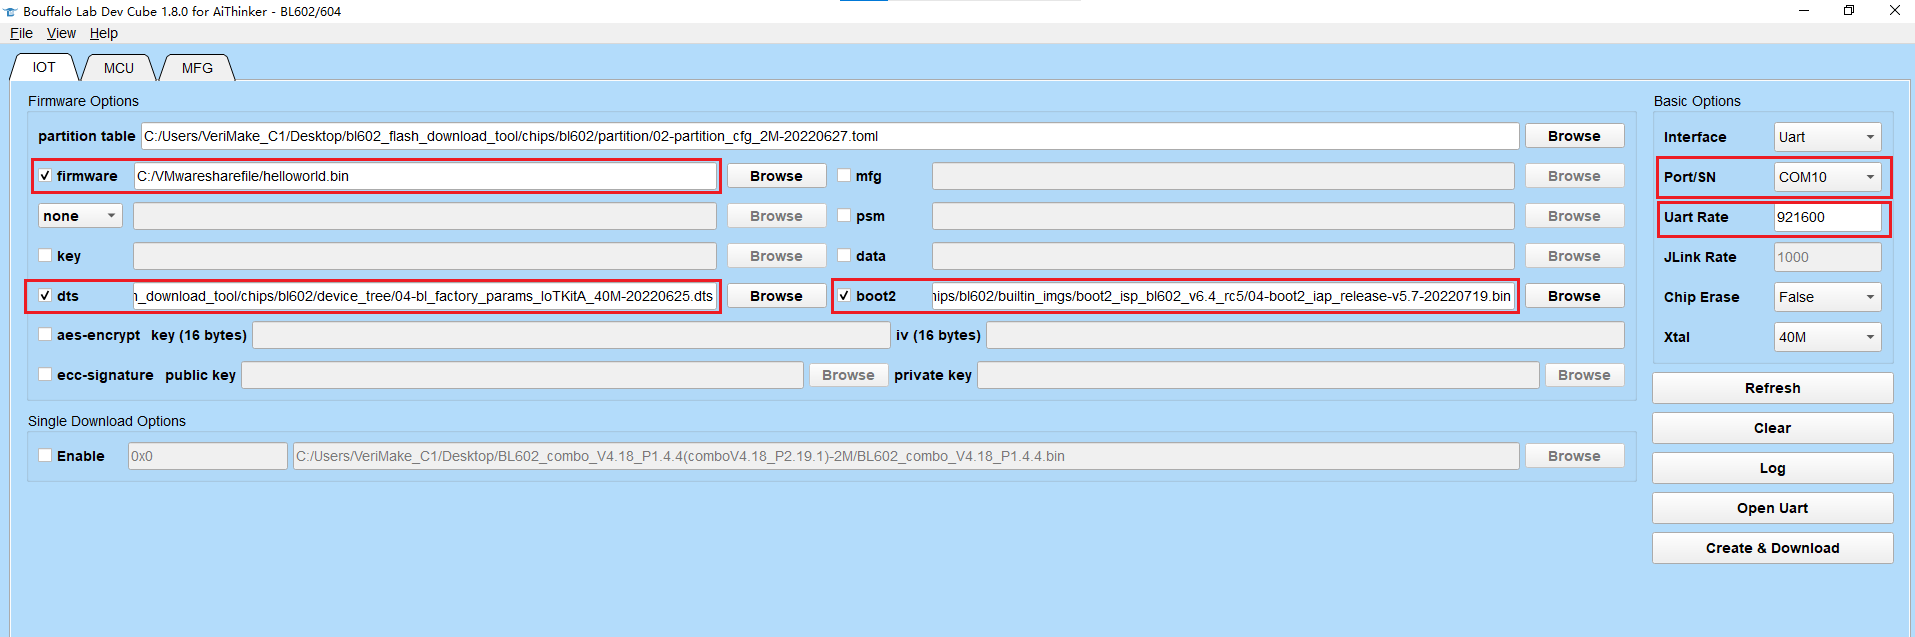
配置文件 按照下面的图配置文件(已经用红框圈出了)。注意要先选择partition table,其余设置才会出现。
这里firmware就是刚刚生成的bin文件
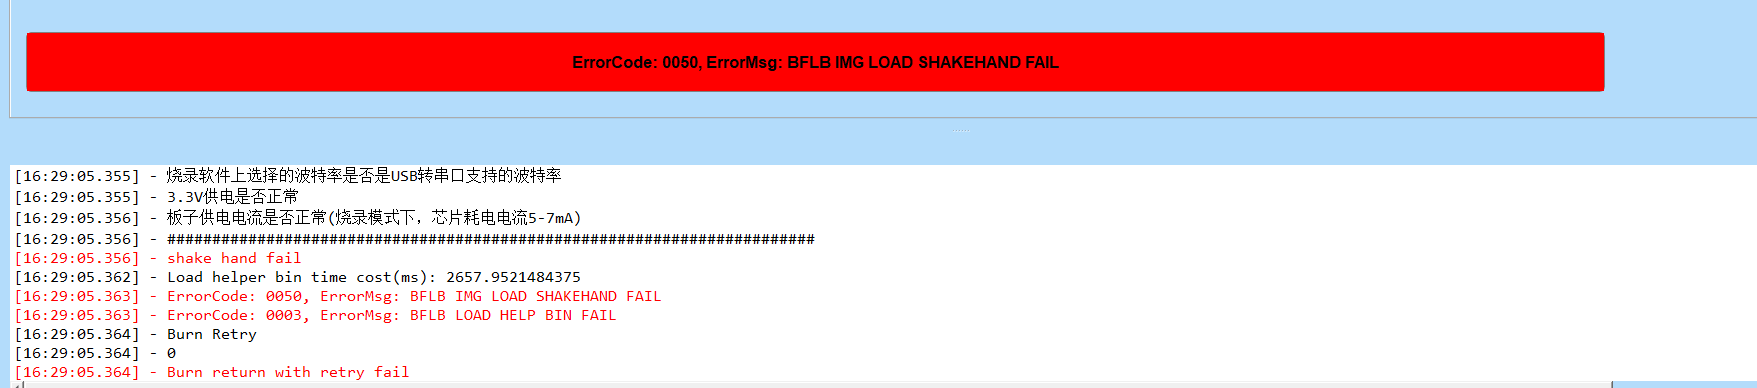
下载 点击Create&Download 若出现shake hand fail,先按住burn,再按en;然后先松en,再松burn。进入boot模式
shake hand fail
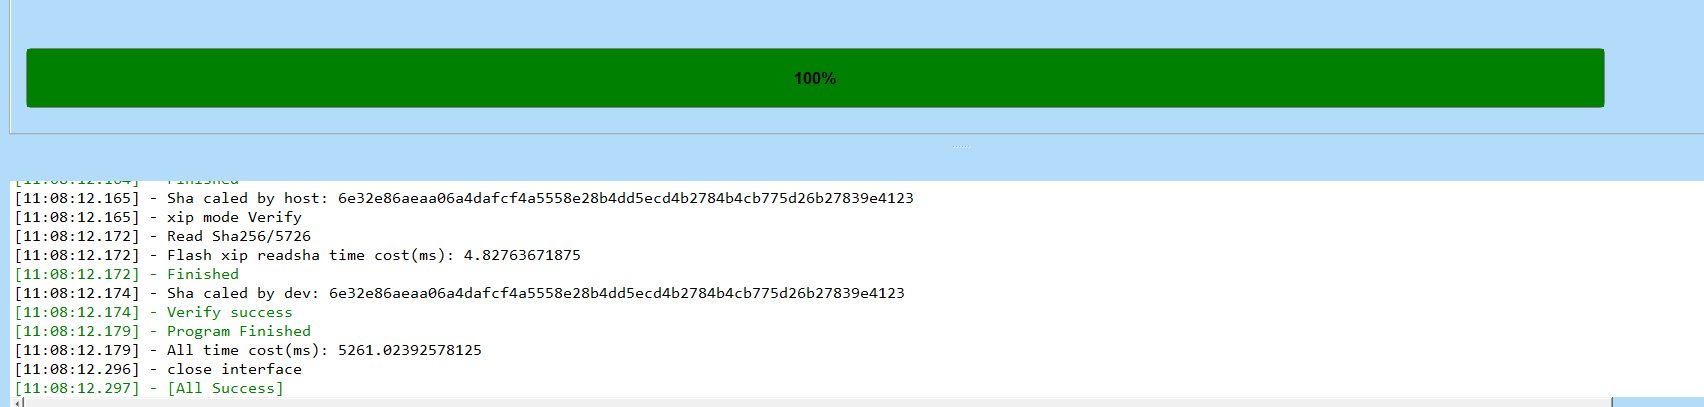
看到提示Please press reset就按EN键。 看到如下图显示,则烧录完成
Please press reset
网站备案号:ICP备16046599号-1


 网站备案号:ICP备16046599号-1